Goldstein Lab
  • Home
  • People
    • Current people
    • Former members
    • Local community
    • Facebook
  • Publications
  • C. elegans movies
  • Tardigrades
  • DIY Microscopes
    • Overview
    • The original Instructable by Kenji Yoshino
    • Previous workshops and images
    • Ideas for uses with students
    • Organize a Workshop
    • Sources for parts
    • Leave feedback on a workshop
  • Positions
  • Contact
Organize your own workshop!
Once you've made a microscope, you might consider sharing what you've learned by organizing a workshop. I started running in-school workshops for elementary school teachers after contacting one of my own kids' teachers to ask if this seemed of interest to elementary school teachers. The feedback was great – the microscopes were an easy and inexpensive replacement for dusty old microscopes that only one person could look into at a time.

Below are some tips for anyone who'd like to run their own workshops, based on our experiences so far. Kenji's original Instructable is of course a great resource – I recommend reading that first. What's below assumes that you've already seen the Instructable.


assembly diagram by Bob Goldstein
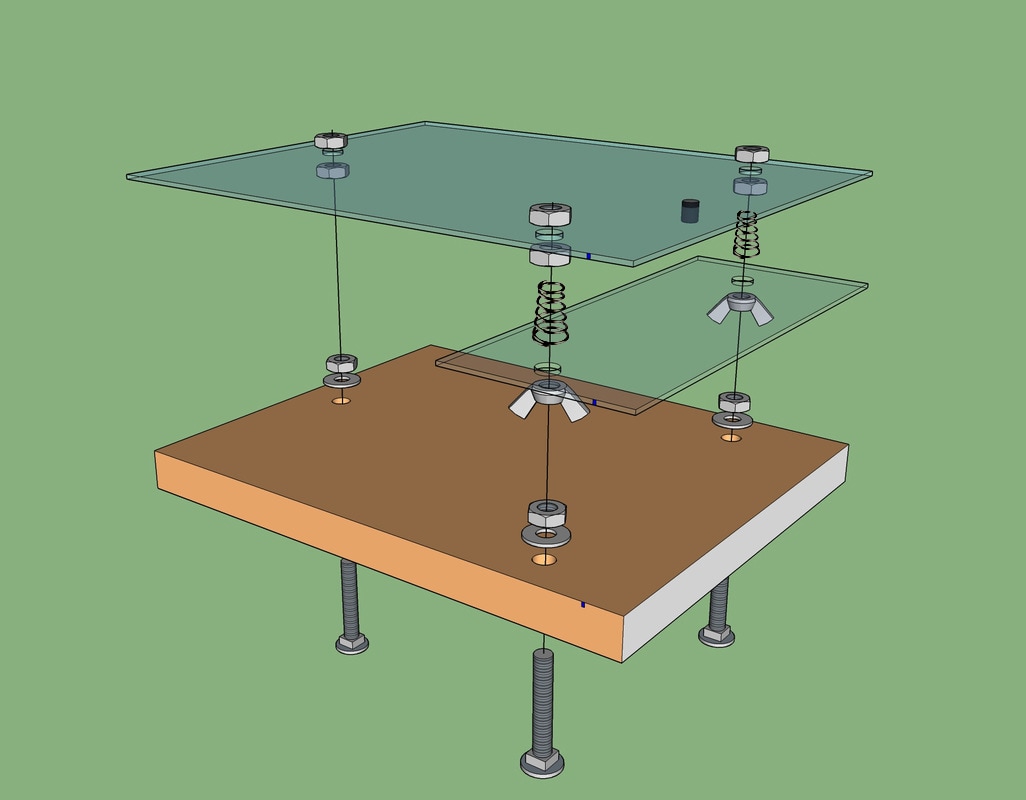
assembly diagram (click to enlarge)


Overview of our workshops:
I pre-cut the plexiglass, drill the holes in the wood and plexiglass, and glue in the lenses, and the workshop participants then do the rest of the building. Workshops for teachers run 90 minutes, and three things happen:
  1. Participants assemble their microscopes.
  2. Participants look at microscopic things, become pros at using their microscopes, and collect photos through their microscopes.
  3. For workshops with teachers, the teachers share their ideas about ways to best use the microscopes with kids in classrooms.
I provide enough materials for each workshop participant to take away their own microscope. The parts typically cost us about $10 per microscope, with prices depending in part on bulk discounts. Many of the detailed ideas below were shaped by input from teachers, college students, museum staff, volunteers, and other workshop participants – thanks!


Preparation of materials:
  • I buy lenses in bulk online instead of taking them from laser pointers as some people do.
  • Based on teacher recommendations, I've been making 8x10 inch microscopes (bigger than in the original Instructable) to fit large smartphones or iPads/tablets. Some schools have multiple iPads or other tablets that classrooms can use. iPads have the camera on a corner, which means that an iPad can fit on the microscope diagonally with the camera on top of the lens if (1) the three holes are drilled in the plexiglass and wood close to the edges—generally within 1 inch of the edges and (2) the lens hole is roughly in line with the two other nearby holes. Amazon Fires are very inexpensive tablets that work well too. For tablets with the lens in other locations than a corner, you may need to get creative with where you put your lens.
  • I use Optix 0.08 inch thick clear acrylic sheet plexiglass, which comes in 8x10 inch sheets.
  • For 8x10 inch microscopes, I cut 8x10 inch Optix sheets in thirds to make 8 inch x 3 1/3 inch stages. Optix 0.08 inch thick sheets are easy to break by scoring with a razor blade along a straight line and then bending really hard by hand (while wearing goggles) to snap them in two along the score line.
  • In my experience, a drill press does a great job of drilling through the plexiglass without breaking it, much better than a hand drill does (see video on this page). Some makerspaces have drill presses available for you to use. If you're not using springs (see more about springs below), then be sure to drill the stage (the 8 x 3 1/3 inch plexiglass piece) in places that will allow the stage to balance on the wing nuts – centered on the roughly 3 1/3 inch breadth. I recommend measuring out hole positions so they'll be perfectly symmetric (here's a symmetric template to print out that you can use), then drilling 3 holes in 1 piece of plexiglass, and use that piece as a hard plastic template to mark drill hole positions in every future piece of wood or plexiglass (that's what I did for the drilling in the example video - you'll see blue circles where I marked positions to drill).
  • An 11/32 inch (8.7mm) drill bit is absolutely ideal for drilling the lens hole. With this size drill bit, the lens will generally fit snugly in the hole.
  • Put a tiny drop or two of superglue on the lens housing before pressing it into the lens hole (I press it in with a wood block if it's a tight fit). I put some wax paper underneath so that I can push the lens down through the hole until it's perfectly flush with the plexiglass surface, without gluing everything to my work surface by mistake. If the lens is a little loose in the hole, add a little extra superglue and rotate the lens in the hole to spread the glue a little, and allow to dry for 2 hours (superglue sets in minutes but takes a couple of hours to cure fully). Take care not to touch the clear part of the acrylic lens (the lens works best when it remains clean) or to glue your fingers. On rare occasions, a lens will come loose, so you may want to tell workshop participants that they can use superglue to fix that.
  • Superglue fumes will cause plexiglass nearby (within a few millimeters) to turn frosted if the plexiglass has a little finger grease on it. So try to avoid touching the plexiglass near the lens hole before or during gluing. Don't use excessive amounts of superglue, and as the superglue dries, don't leave the drying lens/plexiglass in contact with other plexiglass pieces.

Just before the workshop:
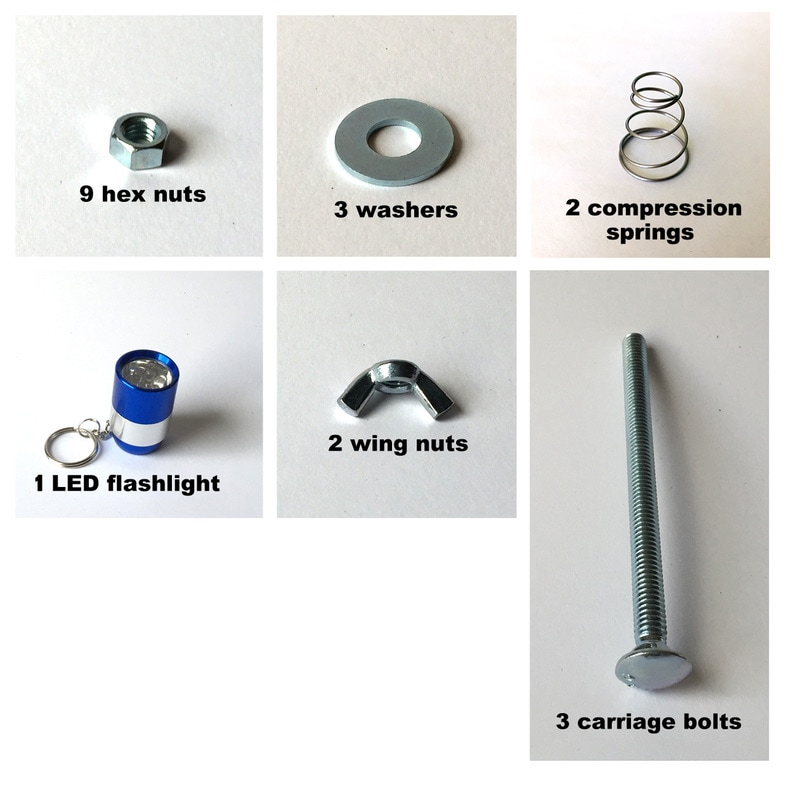
  • Before the workshop, we ask each participant to bring in at least 5 things to look at, including at least two things that are likely to be unique—things that no one else will probably bring. Some ideas: salt, cloth, small flowers, cloth band-aids, velcro, torn paper, feathers, sandpaper, money, lint, onion, and bugs, bugs, and more bugs! It's been great fun to see what people bring. Live bugs work fine too when they're inside clear zip-loc bags.
  • I bring along a bag of goodies for anyone who runs out of things to look at, including a red onion for anyone who wants to see onion cells (details below). And I bring a ruler that has millimeters on it, in case anyone asks about magnification (details below). I try to bring only things that people can find easily (no glass slides and nothing from my research lab) so that people can see what's possible without any hard-to-find equipment.
  • For each workshop, I set up a Dropbox File Request to invite participants to share images during the workshop.

Picture

Picture
list of loose parts
At the workshop:
  • I give everyone the wood, plexiglass stage, and plexiglass/lens top part, and hardware parts they'll need, plus a light, a piece of sandpaper, and a rag.
  • I show the assembly diagram that I made to workshop participants by either projecting it on a screen or printing it out. Feel free of course to use the same diagram yourself.
  • Then, I usually show people how the microscope is supposed to work. It's not much more than a lens on the end of your smartphone/tablet, except that the stage and wingnuts allow for fine control of focus position, and the loose LED light allows for creative lighting solutions (unlike on many laboratory microscopes, you can easily move the light to wherever you like). These two features make a world of difference for being able to readily see microscopic detail.
  • I walk around, help out, and answer questions. And I look at photos people are taking to make sure they're learning to get great photos. Sometimes other people who've built these in previous workshops volunteer to come along and pitch in.
  • A tip for how to put the camera down onto the lens accurately: Lay the smartphone down flat in just roughly the right place, then tip up one end of the smartphone—the end where the camera lens is—and then slowly tip it back down while aiming for the lens.
  • Remove the smartphone/tablet case if it's thick, and the camera will be able to sit closer to the lens. If you see a black ring around all of your images, that's the lens casing. Removing your smartphone/tablet case and then zooming a little will take care of that.
  • For iPhones with multiple lenses that keep switching which lens they're using as you zoom in, it can help to disable Macro Mode. I made a slide with instructions for dealing with lens switching on multiple types of phones; I'm happy to share that slide.
  • I ask teachers about any specific curriculum-related goals—for example to see cells—and I try to help them meet those goals. In my state, North Carolina, the public school science curriculum has had a focus on insects (2nd grade), bones and muscles (3rd), minerals and other matter (4th) and cells (5th). This curriculum is changing now, and I'm changing a set of slides to match the new one.
  • I give tips for lighting. For clear things (pond water for example), try putting something dark in the background (like black paper on the wood below the lens) and lighting the objects from the side. Microscopists call this "darkfield illumination", which even on expensive microscopes sometimes isn't included or can be tricky to figure out how to do. Darkfield illumination is what we all use naturally to see clear things, even without microscopes. For example, at night, snowflakes are easy to see where they're lit from nearby but with a dark background. Next time it snows at night, notice how you're naturally taking advantage of darkfield illumination to see if it's snowing. (I ask teachers where they look at night to see if it's snowing, so that darkfield illumination will become intuitive to them).
  • The springs help stabilize the stage, which is pretty wobbly otherwise. If you can't find springs, you can use a really low-tech solution in place of them: gently push a piece of wadded-up paper towel between the stage and the top plexiglass to stop the stage from wobbling.
  • I sometimes use Dropbox File Request to allow participants to upload their images as they take them, and I project the resulting images on a screen throughout the workshop.
  • Want to try seeing individual cells? Flower petals with super-contrasting colors (like dark stripes on pansy petals, or dots on asiatic lilies) generally have one color per cell, making the borders between colors great places to see individual cells. Red onions are fantastic too – peel back past any dry layers and look at a fresh red layer, and you'll see beautiful red cells with white outlines.
  • Curious about what magnification you're getting? You're magnifying at multiple steps: at the microscope lens, your smartphone/tablet camera lens, any digital magnification, and then a projector in some cases too. To calculate the final magnification, simply take a picture of your ruler (I usually zoom in on one millimeter), and then measure how many millimeters long the image is on your smartphone/tablet. The magnification is simply how many times larger that your original millimeter appears (in other words, one millimeter that measures out to 40mm long on your tablet is magnified 40 times). On a projected screen, this number will typically be a few hundred times magnification. On a phone, it will be up to about 30-40 times magnification.
  • I always give credit to Kenji Yoshino for the original microscope design.
  • Feel free of course to share this web site (www.diymicroscopes.org) with anyone if you think it would be helpful to them, or if they want to run their own workshop.
Picture
Picture
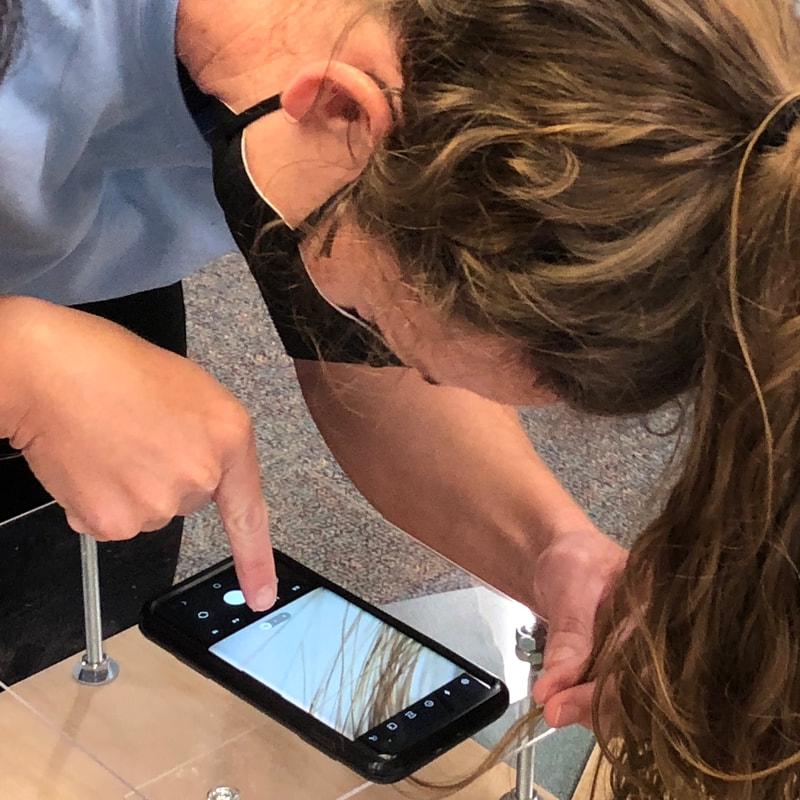
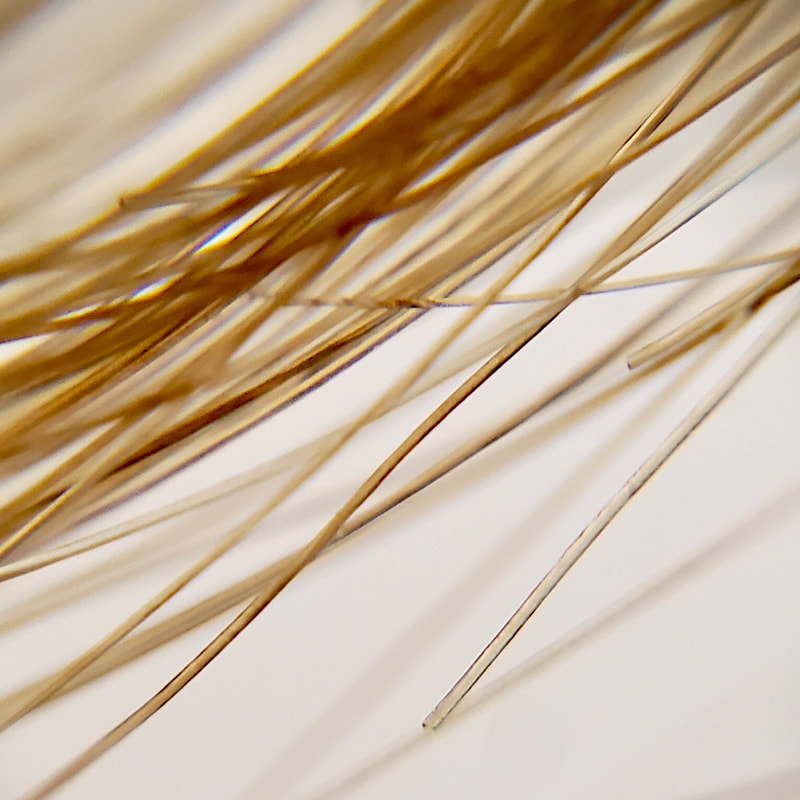
a resourceful teacher examining her own hair in a microscope she just built
Picture
photo by Allyson Roberts
After the workshop:
  • Please do share any photo galleries or social media posts with us. I'd love to see them! And I'm keen to share them on our photo galleries page. I'd also love to exchange ideas, and hear what you learned about how we might improve the workshops or this set of instructions.

Bob Goldstein | Biology Department | UNC Chapel Hill